HOW TO
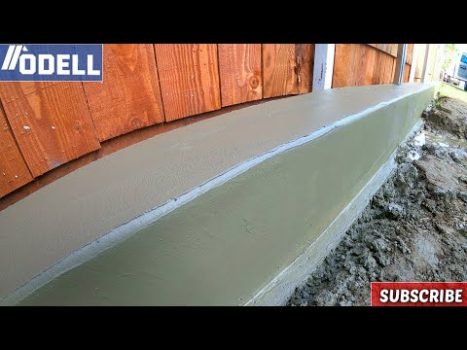
We show you guys how to build and pour a concrete curb for a wooden fence along this house’s property line.
What is the recommended cure time for the concrete before removing the stakes?
A concrete curb for a fence provides a durable and long-lasting solution to keep your fence secure and sturdy. Not only does a concrete curb keep your fence in place, but it also adds an aesthetically pleasing element to your outdoor space. Building a concrete curb may seem like a daunting task, but with the right tools and knowledge, it can be achieved easily. In this article, we will guide you through the steps on how to make a concrete curb for a fence.
Tools and materials required:
– Concrete mix
– Water
– Wheelbarrow or mixing tub
– Trowel
– Mason’s line
– Stakes
– Post hole digger
– Shovel
– Level
Step 1: Determine the layout of your curb
The first step is to determine where you want your fence to be placed. Use your mason’s line to mark the perimeter of your fence. Next, dig a trench where you want your curb to be placed. The trench should be at least 12 inches deep and 10 inches wide.
Step 2: Pour the concrete
Mix the concrete according to the manufacturer’s instructions. Once the concrete is mixed, pour it into the trench until it is about 2 inches below ground level. Use a trowel to smooth out the surface of the concrete.
Step 3: Place the stakes
Place wooden stakes along the length of your curb, leaving about 4 feet of space between each stake. The stakes should be driven into the ground, and their height should be equal to the height of your curb.
Step 4: Set the level
Use a level to make sure that the stakes are level. Adjust the height of the stakes if necessary.
Step 5: Add the remaining concrete
Add more concrete to the trench until it is level with the top of the stakes. Use a trowel to smooth out the surface of the concrete.
Step 6: Allow the concrete to cure
Allow the concrete to cure for at least 24 hours before removing the stakes.
Step 7: Install the fence posts
To install the fence posts, dig a hole in the concrete where you want each post to be placed. The holes should be at least 12 inches deep and 8 inches in diameter. Make sure the holes are spaced evenly along the length of the curb.
Step 8: Place the fence posts
Place the fence posts into the holes, making sure they are level. Fill the holes with concrete and allow the posts to set for at least 24 hours.
Step 9: Attach the fence panels
Once the posts are set, attach the fence panels to the posts using screws or nails.
In conclusion, building a concrete curb for a fence may seem intimidating, but it is a relatively simple process. With the right tools and materials, you can create a sturdy and long-lasting solution that will keep your fence in place for years to come. By following these steps, you can create a beautiful and functional addition to your outdoor space.


Small Vintage Trailer Renovated ON A BUDGET: Step by Step!
Inside Aaron Paul’s Rustic Riverside Home In Idaho
Miami’s Most Legendary Playboy
Somalia’s (Only) Popular Drug
Inside a $9.75M NYC Townhouse with a Prohibition Era Tunnel