

 InfoSearched
Assessing Structural Integrity During Renovations
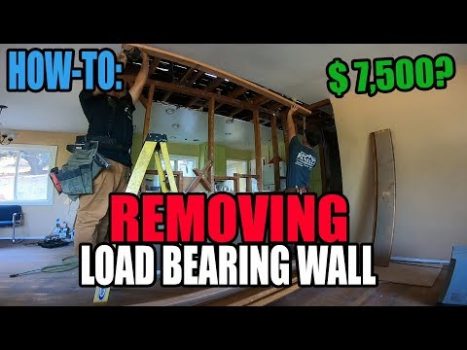
Carpenter Matt Panella tackles that exact problem in “How To: Removing a Load Bearing Wall! (EASY STEP-BY-STEP),” a 12-minute-44-second tutorial posted to his framing and construction channel, MattBangsWood. Rather than treating the job as a demolition project, Panella walks through it as a structural transfer problem — get the ceiling load safely onto temporary supports, cut the old wall out, then build a new load path through a header and jack studs down to the foundation.
- Panella first shows how to tell if a wall is load-bearing by checking whether attic rafters, roof trusses, or upper-floor joists run perpendicular to it rather than parallel — a distinction that determines whether the wall can come out at all.
- Before any cutting starts, the video demonstrates building temporary shoring walls parallel to the partition to carry the ceiling joist load while the original studs are removed.
- Once the old framing is out, Panella installs new king studs and jack studs at each end of the opening to support a properly sized header, restoring a continuous load path to the foundation.
Reading the Framing Before Anything Gets Cut
Panella’s method starts in the attic or basement, not with a hammer. He checks which way the framing members run overhead — joists or rafters running perpendicular to the wall in question is the tell that it’s carrying weight, while parallel framing usually means the wall is just a partition. That inspection step, done before any drywall comes down, is what separates a safe renovation from a call to a structural engineer after the fact.
The distinction matters because a load-bearing wall isn’t just holding up drywall — it’s part of the path that carries the weight of the roof or the floor above down to the footings. Skip the identification step and homeowners risk a sagging ceiling or worse. Panella treats it as step one for a reason: everything that follows in the video depends on getting this call right.
Building the Temporary Shoring Wall
With the wall confirmed as load-bearing, Panella doesn’t touch the original studs until a temporary support wall is standing parallel to it. This shoring wall picks up the ceiling joist load so the house has somewhere else to send that weight while the permanent framing is out of commission.
The old wall doesn’t come out until the new load path is already standing.
That sequencing — brace first, cut second — is the core safety principle of the whole tutorial. It’s the same logic that governs any project where you’re temporarily removing something that holds a house up, whether that’s a wall, a foundation section, or a curb; readers who’ve watched Panella’s approach here will recognize the same measure-twice mentality in a project like How to Make a Concrete Curb for a Fence, where getting the support right before the pour determines whether the finished structure holds.
Cutting Out the Old Wall
Once the shoring is locked in, Panella moves to demolition: the drywall comes off, then the studs are cut and pulled, working from the center of the wall outward. With the temporary wall already carrying the ceiling load, this stage is mechanical — there’s no structural risk left once the bracing is in place, which is exactly the point of doing the prep work first.
This is also where the difference between a rushed weekend project and a properly sequenced one shows up. Homeowners attempting open-concept conversions without a shoring wall are effectively betting that nothing shifts in the seconds between the last stud coming out and the new header going in — a bet Panella’s method is designed to avoid entirely.
Installing the Header, King Studs, and Jack Studs
The permanent fix goes in next. Panella frames new king studs at each end of the opening, with jack studs (trimmers) inside them to carry a properly sized header across the span. That header takes over the job the wall used to do, transferring the ceiling load out to the sides of the opening and down through the studs to the foundation.
Getting the header sized and the studs plumb is what keeps the ceiling from sagging months later — the same attention to load paths and finish work that shows up in larger-scale builds like We Built Our Dream Home, FROM A KIT!, where structural framing decisions made early in the build determine how the finished rooms actually feel.
Once the header is secured and the temporary shoring wall comes down, the opening is framed, patched, and ready for drywall — the load-bearing job done, and the open floor plan finally there to walk through.









The German island with a population of 16
I need a doctor // Struggles of Off-Grid Living
How Does Uruguay Exist?
I Quit The City To Build My Hobbit House
Building a Cabin from Pallet Wood: Cheap Off Grid Homestead