

 InfoSearched
A failed epoxy job gets torn down and redone across 2,000 square feet, one room at a time.
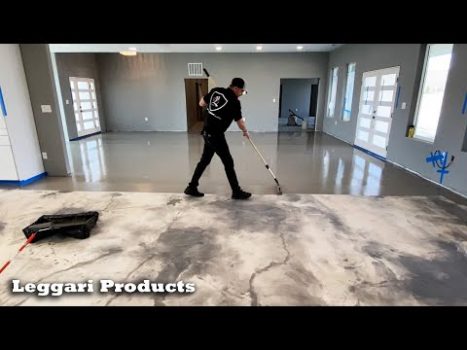
Leggari Products built its reputation on DIY-friendly coating kits, and in late 2020 the company filmed the two-part tutorial that would become its most detailed home installation to date. Part 1 covers the grind, the repair, and the primer stage across an entire residential floor plan that had already failed once with a substandard epoxy job. The homeowners weren’t starting from bare concrete — they were stripping out someone else’s mistake before Leggari’s crew could even think about laying down color.
- The project involved recoating an existing substandard epoxy surface that had failed to hold up to industrial-grade standards, forcing a full redo across the 2,000-square-foot layout.
- The design plan calls for a metallic epoxy system: a silver base coat, black highlight veining, and a blending technique Leggari calls “liquid diamonds” to produce a marble-like finish.
- Part 1 focuses specifically on surface prep, crack and damage repair, and rolling out a water-based primer mixed with water to seal the floor before any color goes down.
Removal of the Original Flooring
The homeowners weren’t installing epoxy for the first time — they were correcting one. Their prior surface had been coated with a product that wasn’t built for the load and foot traffic a full house demands, and it broke down. That’s the scenario Leggari built the tutorial around: what to do when a previous epoxy job fails and the only real fix is grinding it back and starting over with an industrial-grade kit designed to actually hold up.
That backstory matters for anyone watching Part 1 expecting a simple new-construction pour. Prepping over a compromised substrate is a different job than prepping bare concrete, and the video walks through exactly how the crew addressed the existing coating before moving on to patching cracks and leveling uneven sections room by room.
The Prep-and-Prime Sequence
The workflow shown in Part 1 follows Leggari’s standard order of operations: prep the compromised base, repair cracks and damage, then roll out a water-based primer diluted with water to seal the concrete across every room in the layout. That primer step is what allows the metallic base coat to bond evenly once it’s applied — skip it or rush it, and the “liquid diamonds” effect won’t disperse the way it’s supposed to.
Because the project spans a full house rather than a single garage or bonus room, the crew has to manage the sequence across multiple rooms and doorways without letting sections dry unevenly. That’s the core challenge of scaling a metallic epoxy pour from a one-car garage to a full residential footprint.
Silver base, black veining, liquid diamonds — the marble look only happens if the primer and prep are right underneath it.
Future Applications of Metallic Finishes
Beyond Part 1’s scope, the full sequence squeegees and back-rolls the metallic base coat across all rooms, adds the artistic accent veins by hand, and finishes with an industrial urethane topcoat — available in matte or high-gloss — rolled on thin within a 24-hour recoat window. Masking tape comes off the walls and baseboards last, revealing the seamless finish Leggari backs with a lifetime warranty.
For anyone tackling a similar large-scale interior slab, the sequence mirrors other DIY flooring and concrete projects that hinge on getting the base right before the finish goes on — the same logic behind concrete curb work for fencing or the prep-heavy approach in interior repaint transformations.
Part 1 ends with the priming stage done and the house ready for color. The base coat, veining, and topcoat all land in Part 2, where the 2,000 square feet finally gets its silver-and-black marble finish.









Pablo Escobar’s hippos keep multiplying and Colombia doesn’t know how to stop it
Gucci Fall Winter 2020 Women’s Fashion Show
Man captures all walks of life crossing log bridge
Raw Run || Race Against the Storm
100 Years of Controversial Fashion | Glamour