

 InfoSearched
A pair of plastic wine glasses becomes a tiny frozen world, sealed inside curing resin.
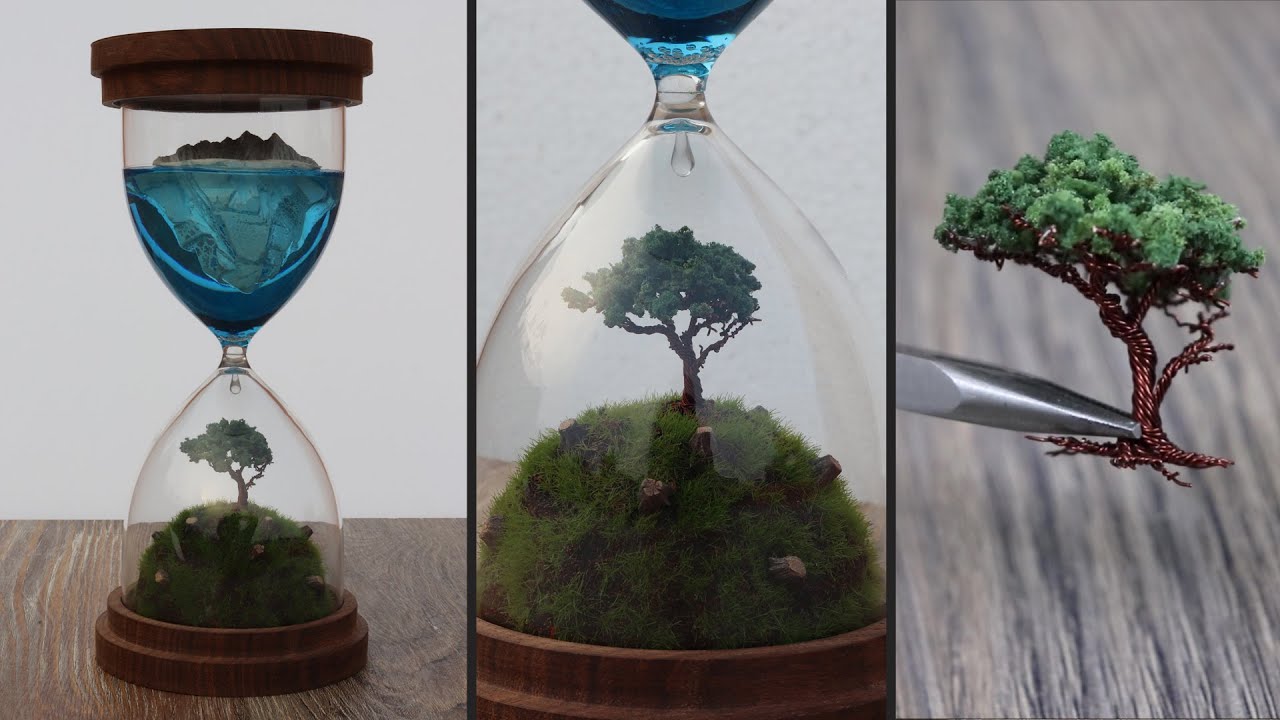
This build takes two ordinary plastic wine glasses, fuses them stem to stem, and turns the resulting hourglass shape into a miniature diorama split between a forested upper chamber and an icy, water-filled lower one. The video “How to Make Hourglass Diorama | Resin Art | Wire Tree” walks through every stage of that transformation, from shaping the glass shell to casting the final tinted resin pour. It’s a project built on precise ratios and patient layering rather than shortcuts.
- The miniature tree is hand-formed from 30 pieces of 28-gauge magnet wire, each cut to 6 inches, then textured with foliage to look like a full canopy.
- The lower half of the hourglass holds a sculpted iceberg and simulated water-drop effects, cast from a 2:1 epoxy blend — 132 grams of resin mixed with 66 grams of hardener.
- That resin is tinted with cerulean blue acrylic paint and transparent blue alcohol ink to mimic ocean depth, then wet-sanded through 100, 400, and 1000 grit to get optical clarity.
Building the Hourglass Shell
The frame starts with two plastic wine glasses joined at their bases to form the classic hourglass silhouette, a technique laid out in the video’s opening timestamp at the 0:08 mark. Getting the seam clean matters more than it looks — any gap or misalignment shows through once resin is poured and light passes through the finished piece. The maker relies on a hacksaw for cutting the glass stems to length and wire cutters for trimming the tree’s magnet-wire branches, with T8000 adhesive and superglue doing the structural bonding where hot glue alone wouldn’t hold.
Sanding is the quiet workhorse of the whole build. Progressing through 100, 400, and then 1000 grit — wet each time — strips away the cloudy surface haze left by cutting and shaping, which is what lets the finished resin read as glass-clear instead of frosted plastic.
The Wire Tree and Tree Stumps
The tutorial’s second segment, timestamped at 2:20, covers the wire tree itself: 30 individual 6-inch lengths of 28-gauge magnet wire twisted together into a trunk and branches, then dressed with foliage to fill out the canopy. It’s the same low-cost wire-sculpting approach hobbyists use for full-scale bonsai-style displays, scaled down to fit inside a wine-glass diameter.
From there, the 4:28 segment shows the tree stumps taking shape. These are built up with aluminum foil as a core and coated in Plaster of Paris for a rough bark-like texture, then hand-painted in Burnt umber, Raw umber, Yellow Ocher, black, and white to shade in wood grain and moss staining. Anyone who has followed a DIY project that relies on foil-and-plaster armatures — the same trick used in dioramas and terrain-building for miniature scenes — will recognize the technique immediately.
Casting the Iceberg and Water Drop
The lower bulb of the hourglass is where the resin work gets technical. Starting at the 6:27 mark, the video sculpts a miniature iceberg to sit inside the glass, then mixes a 132-gram epoxy resin to 66-gram hardener batch — a strict 2:1 ratio — to pour around it. Cerulean blue acrylic and a transparent blue alcohol ink go into that mix to give the liquid an oceanic gradient rather than a flat, uniform tint.
132 grams of resin, 66 grams of hardener — a 2:1 pour is what turns a plastic wine glass into something that reads as open water.
The final segment, at 10:24, adds a simulated water-drop effect on top of the cured surface, a detail that depends entirely on the clarity built up through those earlier sanding passes. Anyone working through similar resin projects at home, including the layered pours covered in the epoxy floor installation walkthrough, will recognize how much the final finish depends on getting that resin-to-hardener ratio exact before it ever touches a mold.
Tools That Hold the Piece Together
Beyond the resin chemistry, the build leans on a fairly small toolkit: scissors, a paper cutter, and a hobby knife for shaping foliage and foil, a hacksaw and wire cutter for the structural cuts, and pliers for bending the magnet wire into branch angles. Hot glue handles quick temporary holds while T8000 and superglue lock in permanent joints — a layering of adhesives similar to what shows up in other small-scale scratch-build projects, including the wire and foil techniques used in start-to-finish natural material projects that also depend on getting a core shape right before finishing it.
The whole thing comes down to that iceberg pour holding its color gradient once it sets — get the 2:1 ratio and the ink balance wrong, and the “ocean” underneath the tree just looks like blue plastic. Get it right, and the wire tree above sits on top of what genuinely reads as frozen water.









Inside Mexico’s Warring Cartels and the Millions of People They’ve Displaced
Stealth Camping In Airport Parking Lot With SUV (Highly Patrolled)
Inside the US-Iran Shadow War for Control of the Middle East
A Day in the Life of a Minimalist
Amazing Melting Pure Gold Technology